January hits different. It’s the month where New Year’s resolutions collide with the realization that you’ve spent too much time staring at your kitchen cabinets. You’re cooped up. The walls feel stale. You want a change, but the thought of drywall dust, noisy drills, and structural damage stops you cold. Who wants to spend their weekend scraping grout?
The good news is that renovation tech has shifted. You no longer need to demolish to improve. There is a method that transforms your cooking space without a single drop of wet cement or a drill bit. It’s fast. It’s clean. And it works.
Зміст
Why Wall Drilling Is Obsolete for Kitchen Renovations
For decades, updating a backsplash meant chaos. You had to cover furniture in plastic, hack away old tile with a chisel, or drill into walls blind. One wrong move and you hit a water pipe or an electrical wire. It was messy, expensive, and risky.
That era is over. Drilling is now a outdated practice for simple aesthetic upgrades. Here is why:
- Dust infiltration: Fine particulate matter gets everywhere. Into your cabinets. Into your dishes. Cleaning it up takes longer than the installation.
- Permanent damage: Once you drill a hole, you can’t un-drill it. Patching and repainting are mandatory if you want to return the space to its original state.
- Rental restrictions: Landlords often prohibit drilling into walls. You risk losing your deposit.
- Tool barriers: Proper installation requires a hammer drill, specific anchors, and a level. Most people don’t own this gear.
Why use irreversible methods when modern materials offer better alternatives?
The Rise of Adhesive Kitchen Backsplash Panels
The solution is straightforward: adhesive kitchen backsplash.
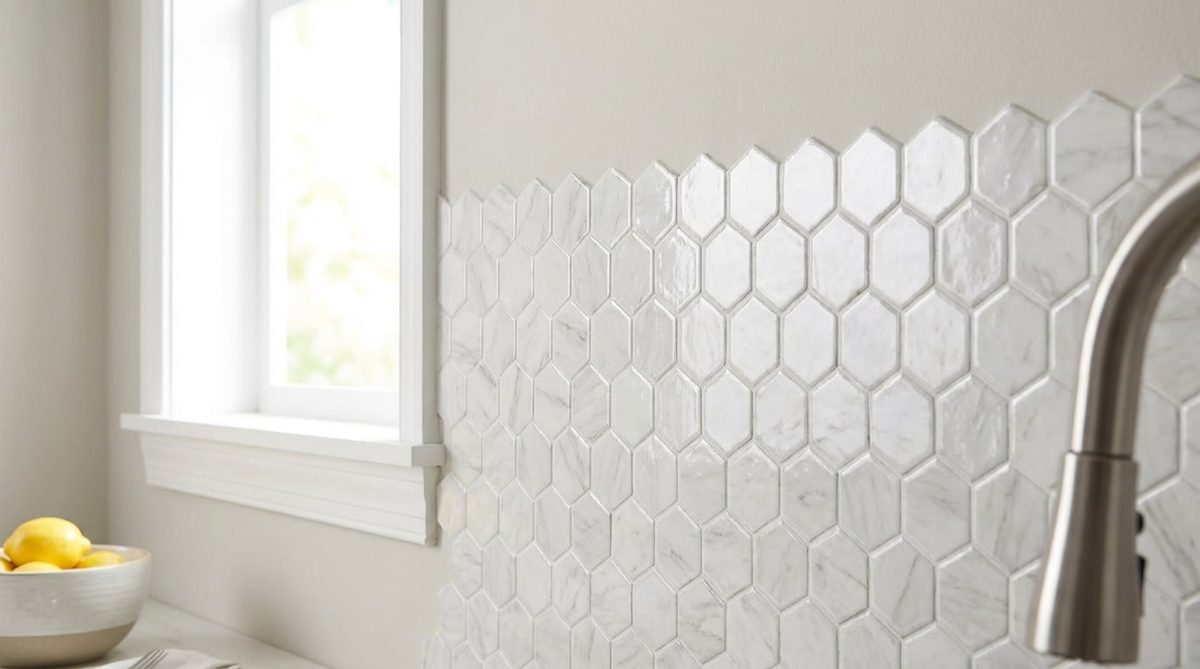
Forget the cheap, flimsy stickers that peeled off after the first pot of pasta boiled. Modern solutions are built from composite materials, heavy-duty vinyl, or aluminum. They mimic high-end finishes like marble, subway tile, or brushed steel with startling accuracy.
This isn’t just a cover-up. It’s a complete surface transformation.
“It is a liberation for the mind: no debris to haul away, no drying time, and absolutely no noise.”
The process is silent. It’s immediate. You apply it, and the room looks renovated. No cement. No waiting. Just a fresh look that holds up to daily use.
Preparation: The Secret to a Magazine-Worthy Finish
Installation is quick. Durability is not. If you rush the prep, the panel will fail. The bond relies entirely on the surface beneath. You need a canvas that is sterile, dry, and free of any residue.
Choosing a Pattern That Transforms the Space
2026 trends are polarized. You either go bold or go quiet. Your choice dictates the room’s energy.
- Retro vibes: Cement tile patterns add color and history to stark white kitchens.
- Industrial edge: Brushed metal or polished concrete effects bring a modern, sleek feel.
The advantage of adhesive panels? Low commitment. If you hate the look in three years, you peel it off and try something else. It’s the perfect way to test bold styles without a long-term contract.
The Importance of an Immaculate Surface
This is where most DIYers fail. Adhesion is everything.
Grease is invisible. It coats your walls from years of cooking. Even a thin film of oil will prevent any adhesive from bonding. If you skip this step, your new backsplash will lift within weeks.
Here is the protocol:
- Degrease aggressively: Use a heavy-duty degreaser or isopropyl alcohol.
- Scrub: Don’t just wipe. Agitate the surface to remove embedded grease.
- Rinse and Dry: Any moisture left behind compromises the bond. Ensure the wall is bone dry before application.
A clean, dry surface ensures your renovation survives the years. It’s the difference between a DIY project and a disaster.
Tools and Materials You Actually Need
You don’t need a pro’s toolkit. You need a few specific items to ensure the job holds.
- Heavy-duty degreaser: Look for something labeled for kitchen surfaces.
- Microfiber cloths: Lint-free. You don’t want fibers sticking to the glue.
- Rubbing alcohol: For a final wipe-down after degreasing.
- Measuring tape: Precision matters.
- Utility knife: For trimming edges.
- Adhesive kitchen backsplash panels: Chosen for your style and wall dimensions.
Safety First
Even without drills, safety is non-negotiable.
- Ventilation: Degreasers and adhesives can release fumes. Open windows. Use a fan.
- Electrical safety: If you are installing near outlets, turn off the breaker at the panel. Better safe than sorry.
- Heat resistance: Ensure your chosen material is rated for heat if placing it near a stove. Vinyl melts. Metal and composite hold up.
The kitchen is the heart of the home. It deserves an upgrade that doesn’t tear the house apart. With the right prep and the right product, you can achieve a high-end look without the high-end headache. The dust settles. The noise stops. And you’re left with a space that feels new again.
What will you change first?
The wall is clean. The materials are ready. Now the real work begins.
Unlike tiling, which requires a steady hand with a trowel and grout lines, installing self-adhesive kitchen backsplash requires precision, not heavy lifting. The secret is not skill. It’s patience. And gesture. That’s where transformation happens. You turn a worn-out corner of your kitchen into something beautiful and new.
Cutting for Perfect Fits Around Obstacles
Kitchens are rarely perfect rectangles. You have to navigate sockets, switches, pipes and windowsills. To achieve a professional look, you need to cut the sheet to size with a sharp knife.
Grab a metal ruler. Use it to guide the blade. This guarantees straight lines. Measure twice. Cut once. Do not skip this step.
For electrical outlets, here is the trick. Turn off the power first. Remove the plastic front panel. Place the adhesive sheet over the exposed box. Cut the opening for the cables and socket. Screw the front panel back on. The result is clean. No visible seams. Just a seamless finish.
Application: Pushing Air Out from the Center
This is the moment of truth. Peel off a small part of the protective film on the back. Place the sheet on the wall. Check your alignment.
When it’s straight, press it down. Start in the middle. Work towards the edges.
This specific motion is critical. It displaces the remaining air. Without air there are no bubbles. Smooth the surface with a soft cloth or plastic spatula. Do this methodically. One part at a time.
If a bubble appears, do not use force. Peel the area back up slightly. Smooth it again. This centrifugal technique ensures maximum adhesion and flawless appearance.
A Durable Upgrade That Actually Looks Good
The result is often surprising. The kitchen immediately takes on character. Modernity. What started as a weekend hobby becomes a tangible addition to the home.
But it’s not just about aesthetics. It’s about longevity. This is not a temporary solution. This is a functional renovation.
A visual impact that can withstand daily use
The high-quality, self-adhesive back panels are heat-resistant. Just keep them at a safe distance from stove burners. They also withstand water splashes near the sink. A smooth surface is easier to clean than mortar. Grout yellow. The mortar becomes darker. A wipe with a sponge is all it takes to keep the back wall looking like new.
The illusion is often perfect. Guests will not suspect that you did this without mixing cement or laying tile.
Why traditional tiles no longer make sense
Given the low cost and ease of installation, traditional tiles lose their appeal in light renovations. It is a unique pleasure to transformation a room yourself. In just a few hours. With minimal tools.
This accessibility democratizes interior design. It lets you adapt your space to your taste without technical barriers. Ingenuity always beats complexity.
Revitalizing a worn-out kitchen doesn’t require a big budget or demolition. Good preparation. A sharp knife. A little care. That creates a new space that handles daily life.
Winter is cold. But it is the perfect time to reinvent the interior. Start the year in a home that actually looks like yours.