Stop staring at boring walls. Stop ignoring the ugly gaps around your floorboards. It’s time to look at trim.
It’s not just about covering up mistakes, though that’s a nice bonus. It’s about adding flair. You can break up the monotony of flat surfaces with baseboards, rails, and molding. Wood? Vinyl? Composite? You have options. Wood and vinyl can be stained or painted to match your vibe. Newer composite products often come with integral color, meaning they never need retouching. That’s huge for the DIYer who hates touching up paint every six months.
Whether you want a traditional look or something sleek and modern, trim is affordable. It’s easy to use. And it adds a personal touch that paint alone can’t achieve.
Зміст
Door and Window Casings
Let’s talk about the openings. Door and window casings are the trim units used around doors, windows, archways, and any framed opening in your home.
They range from simple rectangular profiles to highly elaborate designs. Typically, they’re made from wood or vinyl. The outer edge is usually flat. This allows it to fit flush against your baseboards and other wall trim.
Most of these products are interchangeable. Find a style you like? Use it on almost any opening. It’s that flexible.
Casings do two jobs. First, they create a decorative finish. They tie architectural elements together for a cohesive room style. Second, they’re practical. They conceal unsightly gaps around frames. They even mask small flaws in the drywall that pop up when you retrofit doors or windows.
Casings create a decorative finish at doors and windows, and it can also help tie different architectural elements together to develop a cohesive style within a room.
Doors often get thin columns called pilasters. But you don’t have to go that route. Basic trim designs work just fine.
The top of a doorway? That’s where you might see an entablature. This is an elaborate unit of trim. It can be more than a foot high. Look for carvings or elegant designs. It’s a statement piece.
Windows get treated differently. You can trim the entire frame or just three sides. The bottom of a window frame often has a shelf, known as a stool. Then, you finish it off with a horizontal piece called an apron.
Pillars and Pilasters
Understanding Pillars vs. Pilasters
You might think pillars and pilasters are just fancy words for the same thing, but getting them right matters if you’re planning a DIY install. Historically, columns did the heavy lifting for ceilings. Today? They’re mostly for looks. That’s where the distinction comes in.
Pillars stand alone. They’re surface-mounted or free-standing. You can see them. You can bump into them. Pilasters, on the other hand, are recessed into the wall. They look like columns but are essentially flat plates attached to the drywall or plaster.
“Pillars are surface-mounted or free-standing; pilasters are recessed into a wall.”
Why does this split exist? It’s about framing. Want to highlight a fireplace? A doorway? Or maybe just draw the eye to a specific piece of art? A pair of pillars flanking the feature works. If you’re tight on space or want a cleaner, more modern line, a pilaster adds that classic Greek or Roman vibe without eating up floor space.
Most designs break down into three parts:
* The crown: The top piece.
* The shaft: The long middle section.
* The plinth (or base): The bottom foundation.
You can mix and match these if you buy interchangeable kits. Wood and plaster are standard, but don’t sleep on fiberglass. It’s cheaper, lighter, and easier to mount if you’re on a budget.
Mantel Moldings: Setting the Room’s Tone
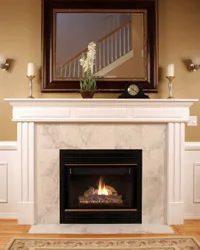
The mantel is usually the star of the bedroom or living room. It frames the fireplace, or sometimes it just hangs there as a standalone shelf for decor. Because it’s a focal point, the molding around it dictates the mood.
Want formal? Go with pillars or pilasters on the sides. It’s elegant. It’s traditional. Want simpler? Use chair rail or flat trim. It works great with modern schemes where you don’t want the woodwork to scream for attention.
“A well-chosen set of mantel moldings can set the tone for the entire room.”
Then there’s the top. Some mantels just stop at a flat display shelf with a simple rounded base. Others go all the way up to the ceiling. If you’re doing this yourself, measure twice. The trim profile can be complex, especially if you’re layering it.
Stair Stringers and Brackets
Stairs aren’t just for going up and down. They’re a structural puzzle. The stringer is the backbone. It’s the inclined board that supports the treads and risers. If you’re replacing stairs, you’re likely dealing with this first.
Brackets come in here. They’re the hidden muscles. They connect the stringer to the wall or the floor, keeping everything from sagging over time. You need the right hardware for the load. Don’t skimp on the brackets. A loose stair is a nightmare waiting to happen.
“The stringer is the backbone… Brackets are the hidden muscles.”
When you’re shopping for materials, look for strength. Hardwood is good, but metal brackets often provide the rigidity you need for safety. If you’re cutting your own stringers, a circular saw and a speed square are your best friends. Get the angle wrong once, and the whole run looks crooked.
Picture rails don’t need to be complicated. The standard design is straightforward. It hangs about one to two feet below the ceiling. That’s roughly 30.5 to 61 centimeters up from your eye level if you’re standing in the room. The board itself is usually about an inch wide. You can find larger versions, too, if your space demands more presence.
How you use it depends on the rest of the room. You can pair it with crown molding. Or you can let it stand alone. Square or rounded profiles are the most common choices. But if you’re going for a federal or classical look, dentil trim is the way to go. That’s the row of small, equidistant squares or rectangles. It adds texture. It breaks up the flatness of the wall.
Traditionally, these rails have hooks. Small metal hooks that slide into the groove. You hang your art from them. No nails in the drywall. No drilling. The rail frames the painting while hiding the hardware. It’s a clean look.
These days, people rarely hang heavy frames from them anymore. The function has shifted. It’s mostly decorative now. It complements specific design styles. It acts as a visual break in large wall spaces. It separates paint colors or wallpaper from the ceiling. Simple tool for complex walls.
5: Friezes
Friezes are often overlooked. They’re the wide horizontal band that runs across the top of a wall. Just below the crown molding. Above the picture rail. Or sometimes just below the ceiling if there’s no crown. It’s a blank canvas for decoration.
Why put effort there? It draws the eye upward. It makes the room feel taller. In older homes, this area was often plastered and painted a different color. Or covered in wallpaper. Today, you can paint it. Or add trim.
A frieze board is usually wider than standard casing. It might be 4 to 6 inches wide. It provides a distinct separation between the wall and the ceiling. It’s a great place to experiment with color. A darker shade here can ground the room. A lighter shade can lift it.
You don’t need complex tools to install a frieze board. A miter saw for the corners. A level to keep it straight. Adhesive and nails to secure it. If your walls are uneven, shims might be needed. But the payoff is worth it. It adds architectural detail without the cost of full crown molding.
Think of it as a frame for the room itself. It doesn’t hold pictures. It doesn’t support structure. It just makes the space feel complete.

Friezes sit high up. You might not notice them immediately, but they define the ceiling line. Traditionally sandwiched between crown molding and a picture rail, these panels are serious business. They can span from a few inches to over a foot in height. If you’re into classical or Victorian aesthetics, this is your spot to flex.
But it’s not just for historical reenactments. Modern design sometimes strips it down to just a solo frieze. No crown. No chair rail. Just that one horizontal band of detail. It’s understated. Especially if you’re working with salvaged or antique tin panels. You can paint them to match or leave the metal raw for texture.
The old-school versions were carved wood or plaster. Or embossed tin. The patterns? Roses. Swirls. Geometric repeats. Sometimes you’ll find a coat of arms or a religious scene if the homeowner wanted to go big. Custom work. For the rest of us, there are simpler units. Basic profiles that pair with ornate crowns without making the room feel like a museum. Less formal. More livable.
Protecting Walls (and Your Sanity)
Chair rail. It sounds fancy. It’s mostly practical. Installed 2 to 4 feet off the floor. That’s roughly 61 to 122 centimeters. The name says it all. It stops chairs from gouging your drywall.
Think about it. You’re pulling a chair out. The backrest swings. Thwack. Without a rail, that’s a dent in the plaster. With it, the trim takes the hit. If you already have scratches, you can add a rail to cover the damage. Instant fix.
But don’t just think of it as armor. It breaks up vertical space. Tall walls can feel cavernous. Plain. Boring. A chair rail adds horizontal weight. It grounds the room. You can run it solo. Or tie it into wainscoting and baseboards.
Style matters here. Traditional homes? Go elaborate. Colonial vibes need detail. Modern spaces? Keep it clean. Simple rounded or square profiles work best. Straight lines. No fuss. It transforms the look without shouting.
The Foundation: Baseboards
Now we get to the bottom. The baseboard. Or baseboard trim. It runs along the floor. Where the wall meets the floor. It’s not just for looks, though it definitely adds polish. It covers the gap. Construction isn’t perfect. Walls aren’t perfectly plumb. Floors aren’t perfectly level. That little space between them? You need something to hide it.
Baseboards also protect the wall. Kicks. Vacuums. Mops. All of them hit the bottom of the wall. Without trim, you’re scraping paint. With trim, you’re scraping wood or MDF. Easier to fix.
Height varies. Standard is 3.5 inches. But in older homes, you might see taller ones. 5 inches. 6 inches. Taller baseboards can make a room feel more substantial. Lower profiles feel modern and minimalist.
Material choice is key. Solid wood holds up better than composite. But composite is cheaper and easier to paint. If you’re painting white, almost anything works. If you’re staining, you need real wood
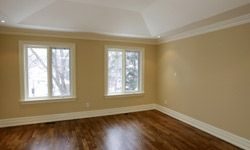
Baseboards: The Bottom Line on Wall Trim
Baseboards aren’t just an afterthought. They are the structural buttress of your room’s perimeter. Found along the bottom of every wall, these trim pieces serve two distinct purposes. First, they take the hit. They protect the drywall from lawnmower blades, vacuum cleaners, and kicked shins. Second, they hide the mess. Specifically, the gap left between your floor and wall to allow for expansion.
Most baseboards have a flat bottom. It sits flush against the subfloor or finished floor. The top edge varies. It can be flat. It can be rounded. But functionally, it frames the floor. For hardwood lovers, a well-chosen baseboard draws the eye downward, highlighting the wood grain rather than the ceiling.
You aren’t stuck with a single option. The simplest version is a straight piece of lumber. Basic. Clean. But if you want more character, you can get carved profiles. Some homeowners pair baseboards with quarter-round molding. This smaller piece of trim goes in front of the baseboard at floor level. It covers the expansion gap tighter. It also takes the scuffs so the main board doesn’t have to.
Crown Molding: Bridging the Gap to the Ceiling
Now look up.
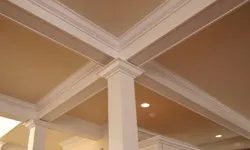
Crown molding lives between the wall and the ceiling. It typically spans the top two to twelve inches. Five centimeters up to thirty centimeters. It’s not just decoration. It’s a visual bridge. It stops the eye from bouncing awkwardly off the ceiling line. It sets the tone for the room’s style before you even notice it.
Beyond aesthetics, it hides things. Drywall cracks at the corners. Plaster flaws. Joints that never quite line up. It also conceals wiring. If you run lights or speakers along the ceiling line, the molding keeps the wires out of sight.
The size matters. Pick a molding that’s too big for a small room and you’ll crush the space. The walls will look shorter. The proportions will be off. Choose carefully.
There are profiles that date back to ancient columns. The ogee is a simple S-curve. Elegant. Minimalist. Rosevine profiles feature carved flowers and vines. They’re busy. They demand attention. Egg-and-dart is a pattern of ovals and straight lines. Dentil molding uses little squares or rectangles. It looks like teeth. Or Roman blocks. A cove profile is just a simple curve. It works well in modern décor where clean lines rule.
Wainscoting: Protecting the Wall, Defining the Room
We moved from the floor up to the ceiling. Now we’re looking at the middle third.
Wainscoting is more than just trim. It’s a wall treatment. It usually covers the lower half or third of a wall. Historically, it was practical. Stone and plaster walls were cold and damp in winter. Wood paneling provided insulation. It also protected the lower walls from chairs, coats, and general wear and tear.
Today, it’s largely aesthetic. But the protection remains. You can hit a wall with a vacuum without ruining the drywall.
There are different ways to install it. Beadboard is the classic look. Vertical grooves. Paint it white. It screams cottage. Chair rail molding often sits on top of wainscoting to separate
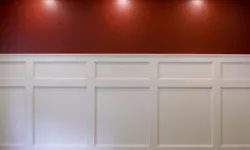
Wainscoting is essentially trim. Large panels cover the lower half of a wall. You can use these panels alone. Or you can sandwich them between baseboards and a chair rail. Some setups end with quarter round trim at the top. That creates a simple finish with clean lines.
Other designs mix materials. You might pair wainscoting with ceramic tile, plaster, or drywall on the upper wall section.
This trim serves two purposes. It protects walls from damage. It also adds a decorative finish. Modern options use vinyl or plastic. You’ll find them in bathrooms and kitchens. The goal is to minimize water damage. Plus, plastic panels are easy to keep clean.
Choosing the Right Material
You can install wainscoting with various materials and techniques. The look changes based on what you pick.
Raised profile panels add texture. Wood is the standard choice here. The raised surfaces create depth on the wall.
Tongue-and-groove paneling offers a different vibe. It uses individual wooden planks. The result is a mid-century aesthetic.
Flat panels are simpler. Paint them. Stain them. They maintain a smooth surface. This works with almost any décor style.
If you want an affordable alternative, try the shadow box technique. It mimics wainscoting without the heavy panels. You use thin trim units. Frame boxes or panels directly on the drywall or plaster. No full panels required. It’s easy to install. It’s cheaper because you’re buying less material.
Why DIY Wainscoting Is Worth the Effort
Homeowners often ask about DIY wainscoting styles because they want a custom look without the contractor price tag. The shadow box method is a prime example. It requires basic tools. A miter saw. A level. A nail gun or hammer and nails.
Safety matters. Wear eye protection when cutting wood. Dust masks help if you’re sanding or working with old plaster.
The process is straightforward. Measure the wall. Cut the trim pieces to fit. Nail them to the studs. Fill the nail holes. Paint or stain.
For moisture-prone areas, skip the wood. Use PVC or vinyl. It won’t rot. It won’t warp. You can scrub it down after a leak or a splashed sink.
Which style fits your space? Raised panels add character. Flat panels blend in. Shadow boxes offer a modern, minimalist take. There’s no single right answer. Just what looks good on your walls.
Start small. A half-wall in a hallway. The back of a dining room. See how it feels.