


Forget the dirt floors of the old cellar. Today’s basements are living space. They hold the furnace, the laundry, and sometimes even a home theater. But because they sit below grade, they fight a constant battle against dampness, mold, and heat loss. Porous concrete invites cold air and water seepage. Poor drainage turns cracks into leaks.
Insulation is the shield. Done right, it stabilizes temperature, stops heat escape, and keeps moisture out. But there is a catch.
You can insulate from the outside, the middle of the foundation, or the inside. External or middle-layer insulation usually happens during construction. For existing homes, interior basement wall insulation is the practical choice. It is the most cost-effective route. But it carries risk. If you skip the details, you trap moisture against the concrete. You create a perfect breeding ground for mold.
Before you buy a single roll of fiberglass, you need a plan. And a checklist.
Зміст
Meet the Code and Check the R-Value
Local jurisdictions don’t care about your aesthetic vision. They care about safety. Fire codes typically require that foam or batt insulation be covered by drywall or another fire-rated finish. Burn through a wall of exposed foam? That’s a failed inspection. That’s a redo. Call your local building department early. Confirm the requirements. Do not assume.
Next, determine the R-Value. This measures thermal resistance. The International Energy Conservation Code provides the map. The US is divided into five climate zones. The colder the zone, the higher the R-Value you need. Most of the country sits between R-5 and R-10. Check your zone. Buy insulation that matches.
The Tool List: What You Actually Need
You likely have half these items already. The rest require a trip to the hardware store.
Essential Safety Gear
– Safety glasses
– Dust mask or respirator (insulation fibers irritate lungs)
– Protective clothing (long sleeves, gloves)
Measurement and Cutting
– Tape measure
– Utility knife with spare blades
– Straightedge for clean cuts
– Chalk line (for marking long, straight cuts)
Installation Hardware
– Stapler (electric, standard, or hammer type)
– Three-eighths or half-inch staples
– Wire insulation hangers
– Work light and extension cord
– Stepladder
Sealing and Finishing (Conditional)
If you are using rigid foam or dealing with drafty cracks, you will need more.
– Expanding foam sealant
– Caulk and caulking gun
– Gypsum drywall (half-inch)
– 2 x 2 lumber (for framing if required)
– Construction adhesive
– Tape: white vinyl or duct tape
– Extruded polystyrene foam boards
– Power-activated gun with fasteners (for heavy-duty attachment)
– Noise protection for ears
– Masonry screws, drill, and carbide drill bit
– Asphalt roofing cement
Some of these tools depend on the insulation type you choose. Fiberglass batts require staples. Rigid foam might need adhesive or mechanical fasteners. Sealant is non-negotiable for air gaps.
To Do or Not To Do
DIY basement insulation is straightforward for many homeowners. It requires basic handyman skills. It does not require an engineering degree. But it is not always the right call.
If your foundation is severely compromised. If you see active water intrusion. If the space is tight and complex. Call a pro.
Find a contractor through the Insulation Contractors Association of America. Or ask neighbors. Ask friends who have finished their basements. They will tell you who did the work well. And who cut corners.
You have the tools. You have the code. You have the knowledge. The walls are waiting.
Choosing the right basement insulation isn’t just about picking the warmest material. You have to look at your specific climate, how moisture behaves in your region, and the actual layout of your basement walls. Get this wrong, and you risk trapping water. Get it right, and you cut energy bills.
Here is a breakdown of the materials you can use, how they perform, and what they cost to install.
Blanket Insulation: The Standard Option
Blanket insulation is the most common choice for DIYers. It consists of flexible fibers, usually fiberglass, sold in batts, rolls, or blankets. You will often find a facing attached to these batts—either kraft paper, foil, or vinyl.
The dimensions are standardized to fit between wall studs. Batts are typically 4 or 8 feet long. Rolls are hand-cut to fit. If you have a large open wall, you can buy blankets in rolls up to 64 feet long.
Performance-wise, standard fiberglass blankets offer an R-value of 2.9 to 3.8 per inch. They are generally cheaper than foam boards, loose-fill, or spray foam. But cheap comes with a trade-off: if they get wet, they lose effectiveness and can mold.
Rigid Foam Board: High R-Value and Vapor Control
Rigid foam boards come from polystyrene, polyisocyanurate (polyiso), or polyurethane.
Polystyrene boards give you an R-value of 3.8 to 5 per inch. Polyiso and polyurethane are stronger, offering 5.6 to 8 per inch. The real advantage here is moisture management. Foam board helps keep water vapor in its gaseous state, preventing it from condensing on your cold wall.
There is a catch. Fire codes usually require you to cover foam board with a half-inch gypsum wallboard. You cannot leave it exposed. It looks unfinished, and it’s a fire hazard.
Loose-Fill Insulation: Filling the Gaps
Loose-fill uses small particles of fiber or foam. It conforms to any space, no matter how weird the geometry. You can pour it or blow it in using a machine. Common materials include cellulose, fiberglass, and mineral wool.
R-values range from 2.2 to 3.8 per inch. Fiberglass is on the lower end. Cellulose is the most efficient. The challenge isn’t the material; it’s the installation. You need to achieve the proper density. Too loose, and it settles. Too dense, and it doesn’t insulate well. Complete coverage is key.
Liquid Foam Insulation: Filling Tiny Cavities
Liquid foam insulation is sprayed, foamed, injected, or poured into place. Materials include cementitious, phenolic, polyisocyanurate, and polyurethane.
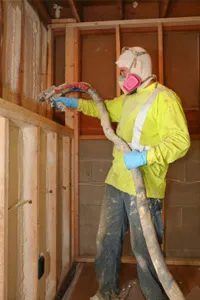
Because it expands and hardens, it fills tiny cavities that batts and boards miss. The R-value per inch is about twice that of traditional blanket insulation. It’s efficient, but it requires specialized equipment and safety gear to apply correctly.
Why Insulate? The Real Benefits
The obvious benefit is saving money on energy costs. But how much you save depends on several factors:
- Local climate
- Type of heating system
- Fuel costs
- How often and how intensely you use the basement
Thermal performance depends entirely on proper installation. This is why many homeowners hire professional contractors experienced in basement insulation. A mistake here is expensive to fix.
For existing structures, the most cost-effective way to insulate while minimizing moisture problems is combining rigid foam insulation with an insulated frame wall assembly.
Moisture and Airflow: The Critical Factor
Insulation is not just about heat. It is about airflow.
Experts emphasize “inward drying.” This means the foundation needs to be able to disperse moisture into the basement, allowing it to dry out. If you restrict airflow, you trap moisture.
A true vapor barrier is often used to block moisture from entering the basement. But it can succeed too well. It traps moisture between the insulation and the wall. If you install insulation on a wood frame and encase it in polyethylene sheeting, the moisture gets trapped inside. It damages the insulation. It rots the wood frame.
Do not blindly add a vapor barrier without understanding your wall’s drying path.
External vs. Middle Insulation: Where the Money Is
You might think higher R-values always mean more savings. Not always.
Consider a 1,500-square-foot home in the Midwest. Using 2 to 3 inches of exterior foam basement wall insulation at an R-10 value saves about $400 a year in natural gas heating costs.
Now look at insulated concrete forms (middle insulation) at an R-2 value. That same home saves about $450 a year.
Why? Because middle insulation keeps the concrete wall itself warm. The thermal mass of the concrete helps stabilize indoor temperatures. Exterior foam insulates the air space but leaves the wall cold. The difference is subtle but real.
Insulating basement walls is a project that pays off. But it requires careful material selection and an understanding of moisture dynamics. Start with the basics. Choose the right insulation for your climate. Watch those energy savings add up.
Finding the Right Help and Sources
You don’t have to go it alone. If the job feels too big for your weekend toolkit, the Insulation Contractors Association of America maintains a contractor locator. It’s a straightforward way to find licensed pros who know the nuances of basement work. But if you’re the type who prefers the smell of sawdust to a sales pitch, there’s a wealth of information waiting.
This Old House has tackled the question of whether you should actually insulate a basement yourself. The consensus? It’s doable, but it requires precision. Moisture management is the real boss here. You can’t just slap foam against damp concrete and call it a day.
The U.S. Department of Energy offers a consumer guide that cuts through the marketing hype. They break down adding insulation to existing homes into practical steps. It’s not just about R-values. It’s about air sealing first. A leaky basement defeats the best insulation in the world. Think of it like wearing a wool coat over a screen door. The warmth escapes. The draft stays.
Technical Deep Dives and Alternative Angles
For the technically minded, Building Science Corporation’s digest on understanding basements is essential reading. It explains the physics of how moisture moves through walls. It’s dry. It’s dense. It’s also the difference between a dry basement and a moldy one.
Tim Carter at Ask the Builder tackles the practical side. His advice on basement insulation focuses on avoiding common pitfalls. Like using vapor barriers incorrectly. Or ignoring the rim joist. These details matter. They’re the difference between saving money on heating bills and wasting it on remediation.
David Darling’s entry in the Encyclopedia of Alternative Energy looks at the bigger picture. Sustainability isn’t just about green roofs. It’s about reducing the energy load of your entire structure. Insulating the basement is often the most cost-effective upgrade you can make. It’s the foundation of your home’s efficiency.
If you’re curious about other upgrades, look into how log cabin kits work. Or how to clean a furnace. A clean furnace runs better. A well-insulated house lets it run efficiently. Make a workbench. Install a fountain. These projects add value. But insulating the space below your feet? That’s the silent hero.
Where to Start
- Audit your current setup. Check for cracks. Feel for drafts. Use a candle on a windy day to find leaks.
- Seal first. Caulk gaps around pipes and wires. Use foam for larger openings.
- Choose your material. Rigid foam boards? Fiberglass batts? Spray foam? Each has pros and cons. Rigid foam resists moisture. Fiberglass is cheaper but sensitive to wetness.
- Install carefully. Gaps are enemies. Overlap seams. Tape joints.
- Check local codes. They vary. Minneapolis, for example, has specific requirements due to climate. The Minnesota Department of Commerce has guidelines that reflect this. Don’t skip them.
“The most effective insulation is the air barrier you create before you add the thermal resistance.”
This isn’t just about comfort. It’s about protecting your home’s structure. A damp basement rots wood. It rusts steel. It breeds mold. Insulation, done right, stops that cycle. It keeps the structure dry. It keeps the air


